

Here is the earliest shot I can find of this side of my living room. It's kind of funny too. We had just got home with our new baby (Isla, my 5 year old) and my husband was OUT on the floor. This was before we painted this room and during a very strange furniture configuration... You can see, the spot where the fireplace is....is a blank wall.

Here's a shot a little later. We had an entertainment center there...before I painted the back door navy. In the fore-ground is my mom holding my sweet Isla. We did a lot in those first few months of her life ;)

Here's what it looked like when I started building the fireplace. The gigantic TV is attached to the wall, and we just pushed the entertainment center under it. Ridiculous. Not what I would have picked mind you (ahem, husband...).

I started this project based on that T.V. I wanted to build something around it, so that it wouldn't look so dang....bad. I found this (below) square base for the fireplace at Habitat Re-store for 20 bucks and it was on!
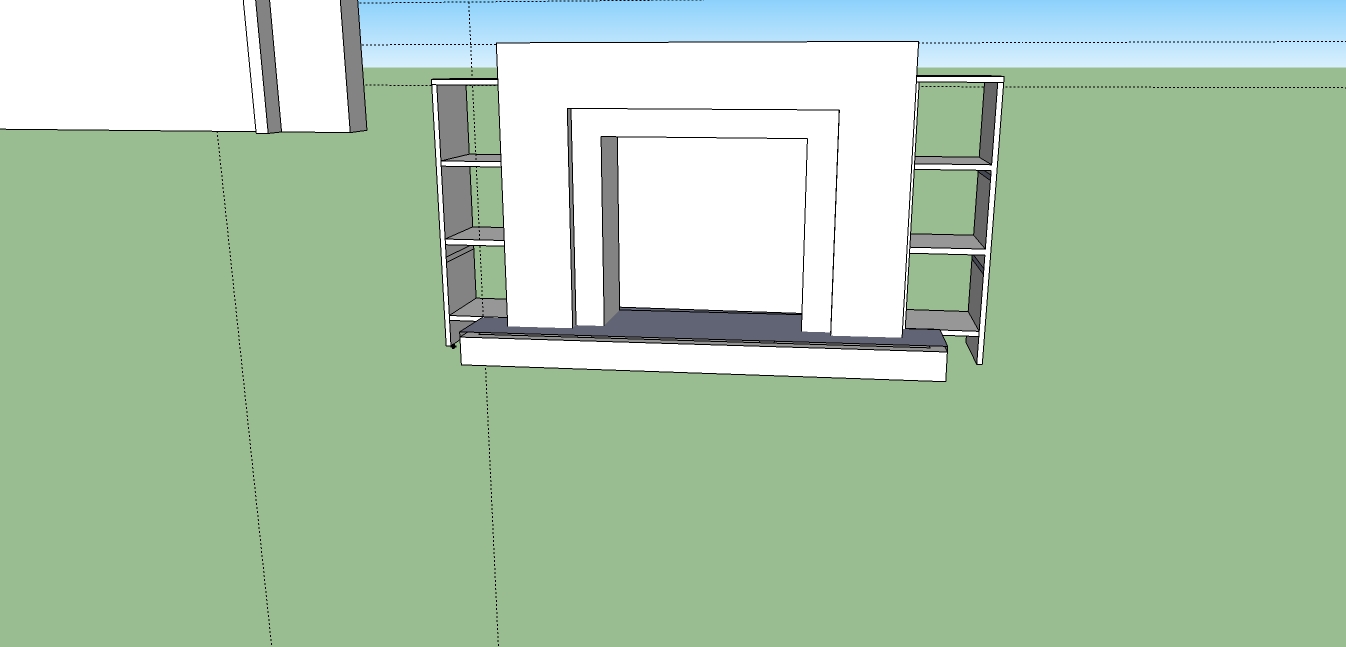
This is the only shot I have of this thing "as is" it is against the wall there behind the lovely group shot of my Dad, Step-mom, sister and I. It is basically a wood box...with a square hole in the front and the back is completely open. I could have totally built that very easily myself, but the price was so cheap that I couldn't have bought the wood to build a box for that little. It just basically saved me some time....and it came with that cool metal insert inside that I ended up painting with chalkboard paint....so that was a bonus.

It's basically this...for more clarity. Except the back was open. I don't know why sketchup closed off the back... If you wanted to build this for yourself, you would basically build a box with an open back...cut a square hole in the front of it...and add a narrow piece of wood around the underneath side of the lip of the hole that will look like a recessed lip (the spot I attached the hex tile surround to). This entire project is made from 3/4 inch plywood, 2x4s.....and pretty moulding.

The first step was to build the frame on the wall. I attached long 2x4s on either side of my T.V. based on the measurements of my already assembled fireplace base. I took them all of the way to the ceiling. I made them the same width apart as the fireplace base.

The 2x4's are attached to the wall standing on their side (the 2 inch sides are against the wall, vs the four inch sides). This way, my new built out portion is 4 inches out from the wall. 2x4s are hard to screw into the wall through a full 4 inches of wood, and you also can't guarantee that there will be a stud to screw into underneath the same spot you want your 2x4 to go. What I did (not pictured above) was to create cleats.

See the smaller flat piece of 2x4 that is butted up against the one that is standing on it's side? That piece is a cleat. It is easily screwed through because you are only going through 2 inches of wood. That piece can also extend whichever direction you need it to go in order for it to be screwed into a stud. Once you have your cleat in place, you then take the 2x4 that is turned on it's side (the one that protrudes 4 inches instead of 2) and screw through the side of it into the side of the flat 2x4. It ends up looking like the picture above. I placed these cleats anywhere I needed support. A piece of plywood is going to go on top of the ends of the 2x4s that are standing on their sides, so add a cleat and 2x4 anywhere you need to support the edge of the plywood layer that will be on top. What I did was to go around the perimeter of the area on top of the T.V. and a few spots across the middle and then did the same for the space under the T.V....and then put a cleat right under the edge of the T.V. on both sides. The T.V. has a 6" clearance, so it was just fine. Just keep in mind if you do this, that you don't block any of the T.V. controls or input connections with your cleats.
Heading back to the fireplace base....you need to build a hearth for this to sit on. I know a lot of hearths are flat on the ground, and that's fine too....you could just add tile under it, but I like the look of the old school raised hearths...I just wanted an updated version. I measured mine relatively small for hearth standards. I have littles, so I didn't want everybody tripping over it.
I built a frame out of 2x4s. I Just screwed them together. I wanted the front to extend beyond the width of the fireplace, for aesthetics....but I knew I would be flanking it with book shelves, so I cut out a space for the shelves, so they would be able to sit flush against the side of the fireplace. I came up with this shape. The back portion is the same width as the fireplace base.

I added some more 2x4s to the center for support. For my purposes, these 2x4s are on their end, so it's giving the fireplace a 4" lift off of the ground.

Next I cut out a layer of plywood (I have the Lowes do my big cuts and then I notched it out with the jig saw....someday I'll have a table saw.)
I just nailed this down on top.

I didn't take a picture of this, but I wanted the fireplace to be a little higher off of the ground, so I went back with some pieces of 2x4 and I made some legs. I used the flat side of the 2x4, so it only lifted the hearth another 2 inches....and I screwed them in all over underneath the hearth for support.
Next....check it out....the fireplace base fits on top of it just like a puzzle! I used a couple of "L" brackets on each side on the inside of the fireplace (remember the back is wide open) to screw the top to the hearth.

Next, I lined up the fireplace base with where it would fit on the wall to make sure I had the right measurements for where to place the plywood that will cover the space under the T.V.

Then I finished adding cleats and starting screwing on the plywood.

I cut a piece to go across the top like shown

And then I added a piece to go across the bottom.

Here is a real life shot of the progress up to this point.
It doesn't look so promising at this point, huh...

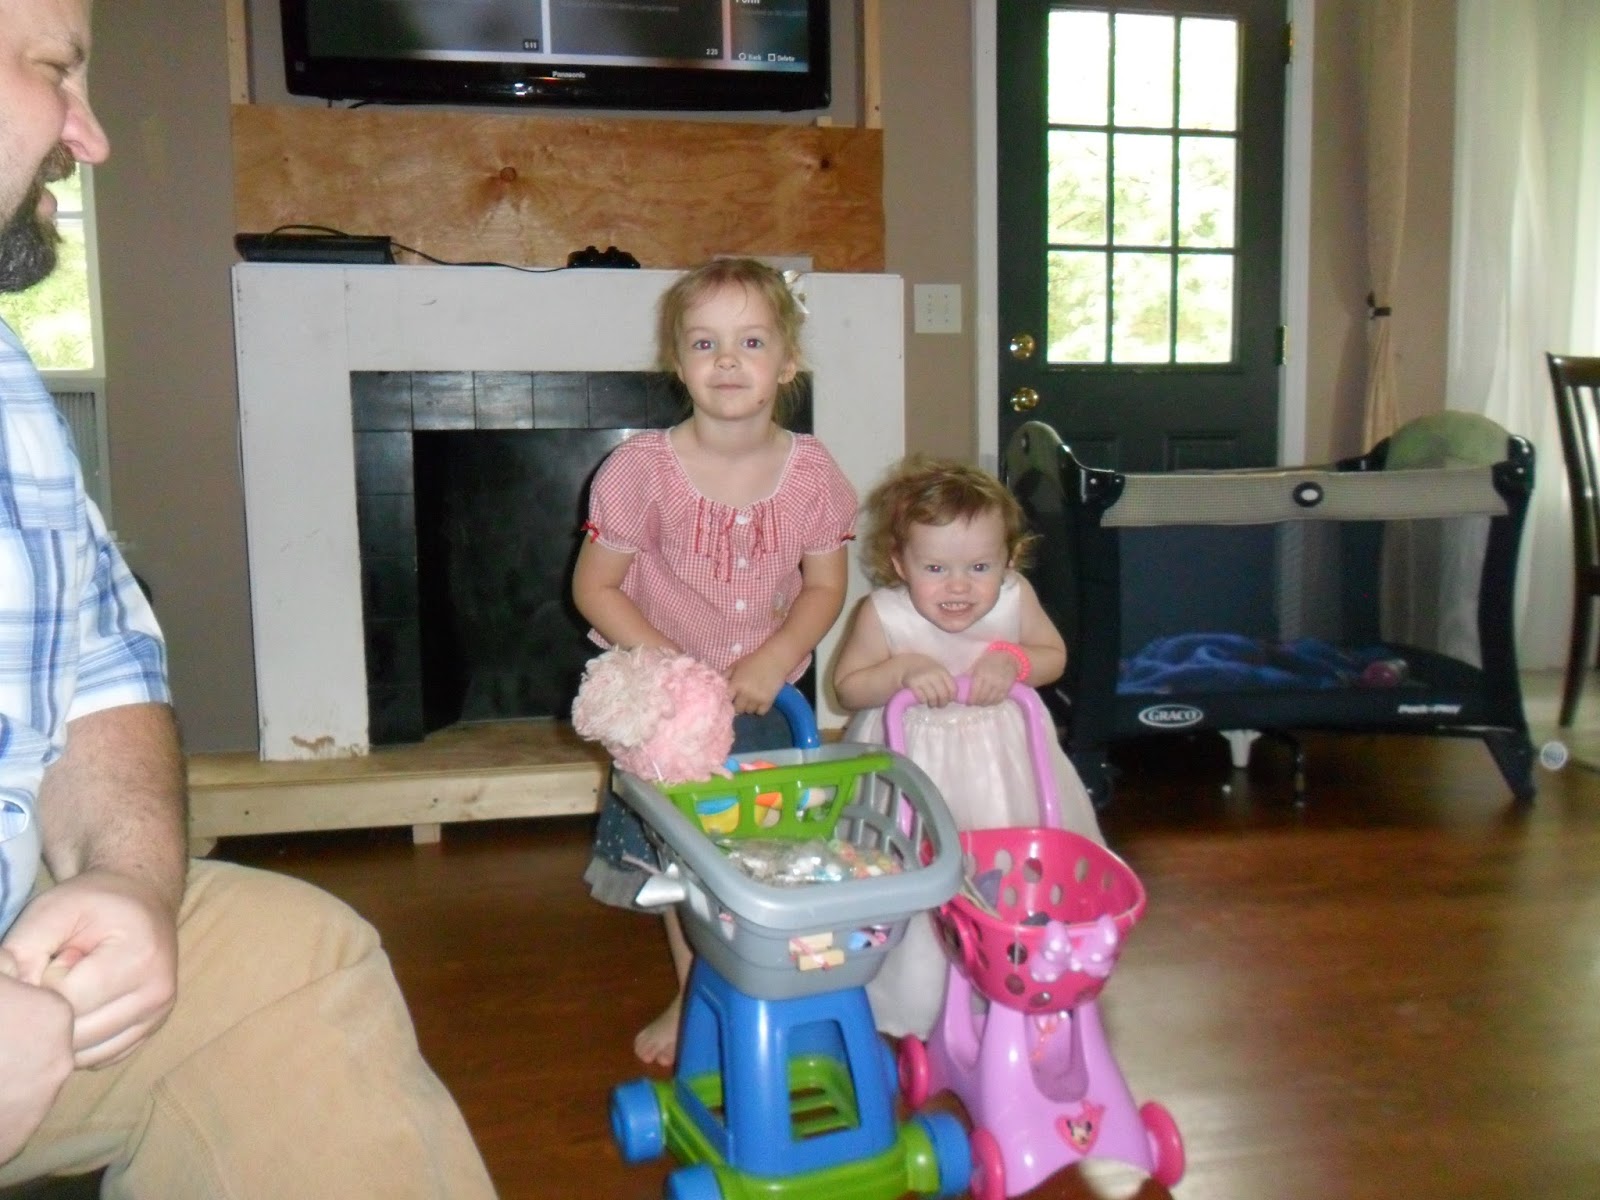
my cuties playing with their daddy :)
After this, I added pieces of plywood to the sides of the T.V. These had to be notched out though, so that we would be able to reach behind the T.V. to get at the controls. I don't have a shot of it....but basically it was a rectangle of plywood that would fit in the space on either side of the T.V., with an arm sized notch cut out of it that was big enough to allow us to reach our arm behind the T.V. on both sides....Yes, it was really ugly...but don't worry, that ugly-ness gets covered.
Next up is the book cases. I decided that I wanted my book cases to come up about 80 percent of the way up the side of my fireplace base and then to be about 2/3rds as deep.
You can see the size difference here.

I put the fireplace base in place on the wall first to get measurements for the shelves and then I constructed them.
**note, I messed up and my fireplace base was a couple of inches narrower than the two 2x4's on either side that it was butted up against. My bookshelves wouldn't sit flush against my fireplace base, so I built around the 2x4 when I constructed the bookshelves...that's why you can see a bump out on the inside of the bookshelves in my pictures. I'm nuts....and it was seriously a challenge. Just glad it worked out, so I didn't have to take the whole thing down and start over. So, just learn a lesson from me and get your measurements right the first time!
For the book cases, I had Lowes cut me two long pieces that were 12 inches wide and 39.25 inches tall (the total height of the bookshelves are 40 inches, but you have to add the thickness of the 3/4 inch plywood top). Next I had one square cut that was 12 inches deep and 11.5 inches wide (the top)...the other three pieces were shorter, because I had to take into acount the thickness of the sides the wood on the sides. The three lower pieces were each 10 inches wide and 12 inches deep.
Next, I measured how tall my fireplace hearth was, and added half an inch for tile (that I hadn't added yet) and used that measurement to determine the height of my bottom shelf.
Add the top of the book shelf first, this will be the easiest to get square and strait. Make sure you square up (with an actual square) every angle as you go. Next, you should add the bottom shelf (see picture below). I just nailed in from the side for all of these pieces....try really hard to get your aim right! I cant count how many times I missed my piece of wood and had random nails sticking through the bookshelf! Again, it's very important to measure all angles and make sure all angles are level and square. You will get wonky bookshelves if you don't.
Here's the trick to make sure you get your bookshelves spaced correctly: Once you have your bottom shelf on, measure from the bottom side of your bottom shelf, to the bottom side of your top shelf. Think of each shelf as a unit of measurement that includes the entire shelf under the unit, but none of the shelf on top of the unit. That probably doesn't make any sense....Take that measurement and divide it by three...or by however many cubbies you'll have....in this case, it's three. That number will be the distance from the bottom of shelf 1 to the bottom of shelf 2, and then again to the bottom of shelf 3 and then again to the bottom of the top board. Hope that helps. Spacing can get tricky some times.
After you nail it all together, it should look like this:

screw those into the side of your fireplace base. You'll have to pull it away from the wall for this...

They should fit like puzzle pieces :)
Put it all together!

Next, let me show you how to build a big thick mantle for cheap cheap cheap!
I measured the fireplace base and I wanted the mantle to have a little bit of overhang on each side, around 2 inches, and then about a 6 inch overhang on the front.

This was so easy... I built a base out of 2x4s and then nailed on plywood for the top.

I added it to the top of my fireplace base and screwed up from the underside of the fireplace base directly into the two cross braced 2x4s in the bottom of the mantle.

At this point, the fireplace is basically "constructed"...now comes the making it pretty part!
I had some plain pine boards 1x6s. I mitered each one on the end and made a frame that would fit perfectly around the T.V. Once I had my frame perfected, I cut the side pieces in half. The bottom and top and the top halves of each side were all nailed on, but the bottom halves of each side were fitted with hinges and then screwed in to fit.


I had to use a router to hollow out the wood where the hinges sit on the inside....this way the hinges were inset into the wood. The little doors just plain wouldn't close without doing this. Don't know if I picked the wrong hinges or if I did something wrong installing them, but this is how I made it work.

Next, I had to add little pieces of wood to cover up the open space at the bottom of the bookshelves.

I used MDF to create the raised surface on the front of the fireplace.

Here's a partial shot of the MDF and the tile I was working on.

Next I added the Tile. I found the Marble Hex tile at Home Depot and the Marble subway tiles at Lowes. How I did the tiling is a whole other tutorial....but I will say it was pretty fun and much easier than I expected! I didn't get a tile saw or anything. I laid everything out and picked off the pieces that I needed cut, marked them where I wanted them cut and took it down to lowes :) They cut all of my pieces for me, even the little mosaic tiles...I think it cost me five dollars.
The moulding around the mantle was one of the most expensive things on here. I used two types of crown moulding. First I used a basic crown to go around the space underneath the ledge. I was so proud of myself for this because there were a bunch of returns to make because of the MDF I added to the front of the fireplace. I went around each rise and indention. I love how it looks :)

Here is what I used to go around the top edge of the mantle.

You can see here how it's two different mouldings stacked on top of each other

I wrapped the very top in crown moulding
and added some lattice strips down the sides of the front and along the wall.

I added some small trim along the edges of the tile and around the opening.

I added more small trim in decorative squares underneath the T.V. and along the intersection between the mantle and the wall behind it....and I also added a small strip of the small trim at the top underneath the crown so that the lattice strips would have something to butt up against.

I added more small trim around the hearth at the edge of the tile, and I wrapped the entire thing in the same baseboard that is in the rest of my house.

I wrapped the bottom of the fireplace (where it touches the hearth) in some very large, ornate baseboard. I also added small trim around the top of the bookshelves and along the front edge of each shelf.

And that's basically it!
The trim work took the most time. If you want to see how I cut and install trim you can read this post here. There were some other bits of trim I added here and there to basically cover up ugly things, but that is going to entirely depend on what kind of job you do while building ;) My motto...add trim until it's pretty!
After that, it was all sanding, caulking, puttying, sanding and then painting.
All done!


Price breakdown:
fireplace base: $20.00
2x4s = already had, but would be roughly $10.00
plywood = already had, but would be roughly $30.00
MDF= $12.00
tile = hex tile $40.00
Subway tile $25.00
grout and adhesive=$15.00
regular crown moulding =$30.00
coronado crown moulding =$25.00
baseboard = already owned, but would be roughly $30.00 (for both tall and small baseboard)
small moulding = already had, but would be roughly $15.00
Caulk =$2.00
Putty=$4.00
Paint=$20.00 (already had)
Sand paper=$3.00
Screws =$5.00
If you had none of these supplies on hand and had to buy everything it would cost approximately $286.00
I paid:
$181.00
Can't beat that :)
xoxo!
Anna
Disclaimer...this is a faux fireplace. Do not try to light a fire in this if you build it...lol....This fireplace has the space to add a ventless, self contained fire unit, but only something that is self contained. I did not take into consideration making any portion of this to be "up to code" or "fire proof"
Shared with:
Wow! The final outcome is awesome!! A lot of work, but definitely worth it in the long run. We don't have a fireplace, so this might be something for us to build because I would love to have a mantel in our home!
ReplyDeleteThat's amazing! Y'all did a lot of work, and it looks so good!
ReplyDeleteGreat post...very detailed. Nice job on the mantel! I love the detailed trim around the fireplace.
ReplyDeleteLove love it! That tile is awesome.
ReplyDeleteThis looks like a big project but the results are totally worth it. Great job!
ReplyDeleteWow! This is stunning! I love the ambiance it brings to the room.
ReplyDeleteThat is such an amazing faux fireplace and it looks incredible in your house! I love it!
ReplyDeleteWOW This is awesome!! Thanks for linking up to inspire Me Monday, just pinned
ReplyDeleteCheck you out girl!! This is amazing! You guys seriously did such a great job with all of the details! Thanks for hoping over to Bewitchin Projects Block party to share this. Hope you will join us again! I will be featuring this at the party!
ReplyDelete-Shonee
www.hawthorneandmain.com
Love it! My husband is making me a faux fireplace that I'll be putting in one of those electric fire log things.... I have been loking everywhere for one I like. I love how yours has the base that extends out on it... Thats what I've been looking for. Ours will be stained wood with faux stone (or at least faux stone facing) lol...
ReplyDeleteSimply wish to say your article is as surprising.
ReplyDeleteThe clarity on your publish is just nice and i could think
you are an expert in this subject. Well along with your permission let me to
seize your RSS feed to keep up to date with imminent post.
Thanks a million and please keep up the rewarding work.
Also visit my homepage - prosolution plus pills
Hi there, You have done a fntastic job. I'll certainly digg it
ReplyDeleteand personally suggest to mmy friends. I'm sure they'll be benefited from this site.
My weblog: xbox live conseguir