Tuesday, February 25, 2014

Bird's Nest Baby Shower

Hey Y'all :)  How was your weekend?  Mine was okay... I did nothing... and I mean absolutely nothing.  It was nice, but at the same time, I feel ready to do something this week!  I have a few small projects to finish up and I need to finish up on the caulking of my fireplace.  Oh the fireplace.  It has come to that stalled out point where it looks okay if you catch a glimpse of it out of the corner of your eye, so in natural Anna fashion, I've ignored this project for the anticipation of other ones.  Once I finish caulking it, I will add another couple coats of white paint...then I have to add molding to frame out the window next to it, so that wall will quit looking unbalanced, and then I have a phase II of this project that needs to be completed....I'm going to call it operation cover up the eye-sore TV.  I have a pretty nifty idea for doing this that I'm sure you will all be interested in hearing about.....so I guess I need to get on finishing that, huh. Well, I'm talking a bit about my fireplace today because I'm going to show you some photos from a few weeks ago when I hosted a baby shower.  My fireplace, although not even close to done, was featured in the decorating and pictures from this shower....just know, this isn't a finished product.  Consider this a sneak peek!


The shower was for my friend Julie who was expecting a new baby boy.  He is her 5th child, but she had nothing for a boy...so she really needed a shower.  I thought it turned out very classic.  I was trying to channel Julie's style which is earthy, clean lines and lots of neutral.  Her home looks like a pottery barn catalog.  I wonder if she'd ever let me take some pictures to share on here....because it's pretty amazing.  She has a couple of nests under glass cloches in her home and the thought of those stuck with me as I was envisioning what kind of decor to do for this shower.....then it just hit me, nest, eggs, birds.....new life....baby!  It was perfect!   Here's our table spread.  We used the colors green and blue with earthy touches and all white dishes. We had sandwiches, salad, two types of hummus, veggies, gummy cinnamon candy and red vines (Julie's favorite candies), and a whole spread of awesome dippers for the chocolate fountain....and a cake of course.


chocolate caramel covered pretzel sticks were for party favors. 


See my ugly chandelier? Well, I had the idea to add a nest to sit on top of it! 


I twisted and turned this big grapevine wreath (from hobby lobby) until I got it to sit evenly around my chandelier.  (man, I can't wait to get some new lighting for the kitchen).  Then I added little birds all around.  They all represent a member of her family....I love it :) 


This is what was set out on the entryway table.  This little table (which I'm going to paint a different color soon) is opposite from my little mudroom area in my teensy entryway.  I used a combination of pete moss, grapevine wreaths and baskets for most of the nests I made.  We stuck little birds all over the place too.  (see that red bird....it chirps.  It's motion activated.    I still hear chirping when I go in my closet, because my husband hid them in there thinking it would make it shut up....and now I can't find it.  I don't know why he didn't just throw it away...ha!)


My sofa table.  I made that runner for this shower (and I liked it so much, it stayed).  You can see my method for making a table runner here.   I also whipped up a simple little burlap canvas with his name on it, added a nest with a couple little eggs and the bird is actually a Christmas ornament I pulled out.  We had a onesie signing station, where people could sign the onesie or write a cute message with the fabric pens.  


I put this plant in the corner on a stool, with a sherpa blanket wrapped around the base of it to add texture.  Then I had these two snowy owl ornaments.  They didn't photograph well, but they were super cute in person.  I also added a little nest to the tree too.


This wreath I made for the shower.  I showed you guys how to make that here.  That hung on my big mirror that is just floating in the middle of the wall.  It used to be over the couch before we moved the couch to the center of the room.  I have plans on moving that mirror somewhere else, but it has to wait on other things to happen first.  


 I made this cute chevron banner out of drop cloth fabric, painter's tape and green paint.  Then we made (my friend with a silhouette helped me) the onesies for her to take home, and then hung them up on the banner.  I can do a post soon on how to make those.  They are super easy :).  Funny thing about this, I painted it at night and I purposely painted it very lightly, so you could see the "rustic" texture of the fabric through the paint....well, when I hung it up on the morning of the shower, I realized, too late, that the light from the window would be shining through the blotchy paint from behind.  It wasn't a good look.  It made it look very "home made".  If you were to repeat something like this....especially something that will hang in front of a window, I would make sure to really saturate your fabric with paint and make sure it's evenly painted.  


And here's a shot of my unfinished fireplace.  I painted the back of the surround with chalkboard paint.  it says "let's help Julie feather her nest" if you can't tell.  I tried my hand at chalkboard art, but am not the best at it....I still think it turned out super cute though.  The banner is made out of brown, cream and tan burlap, blue ribbon, green fabric for the letters...we ironed them on to the burlap with heat and bond.  


On the mantle (ignore the ugly TV)....we have a H.  My friend actually made the H.  It was super cute.  I don't have a shot of the other side of it, but it was reversible.  There was a different fabric on the other side.  The chevron is the same fabric I used on the table runner.  Then we have some random birds and nests, glass bottles and a couple of these glass wire holder things I have (they came from my husband's father) I also have a big white candlestick with a nest and a few eggs on it....and then my biggest nest.


I used a grapevine wreath, propped it up on an upside down bowl, and then filled it in with green and brown pete moss.  Next, I popped in real eggs (they were still cold from the fridge...ha!)  I grabbed a sharpie and personalized them.  Funny thing.  those eggs didn't end up sitting out for a super long time, so I ended up putting them back in the fridge and we ate them later.  I really loved how this nest turned out....with that one sweet little bird.  It was just perfect for Julie, seriously.  


Here's a super unfinished shot of the side of the fireplace.  This part has been completely covered over since.....but hey! You can't let the simple fact that your house is unfinished deter you from enjoying life and having friends over and doing a service to a great friend.  Nobody cared....least of all me :) 


In the kitchen with my co-host....it's an awful mess, but I've never shown you guys my kitchen, so I thought you might like a glimpse.  


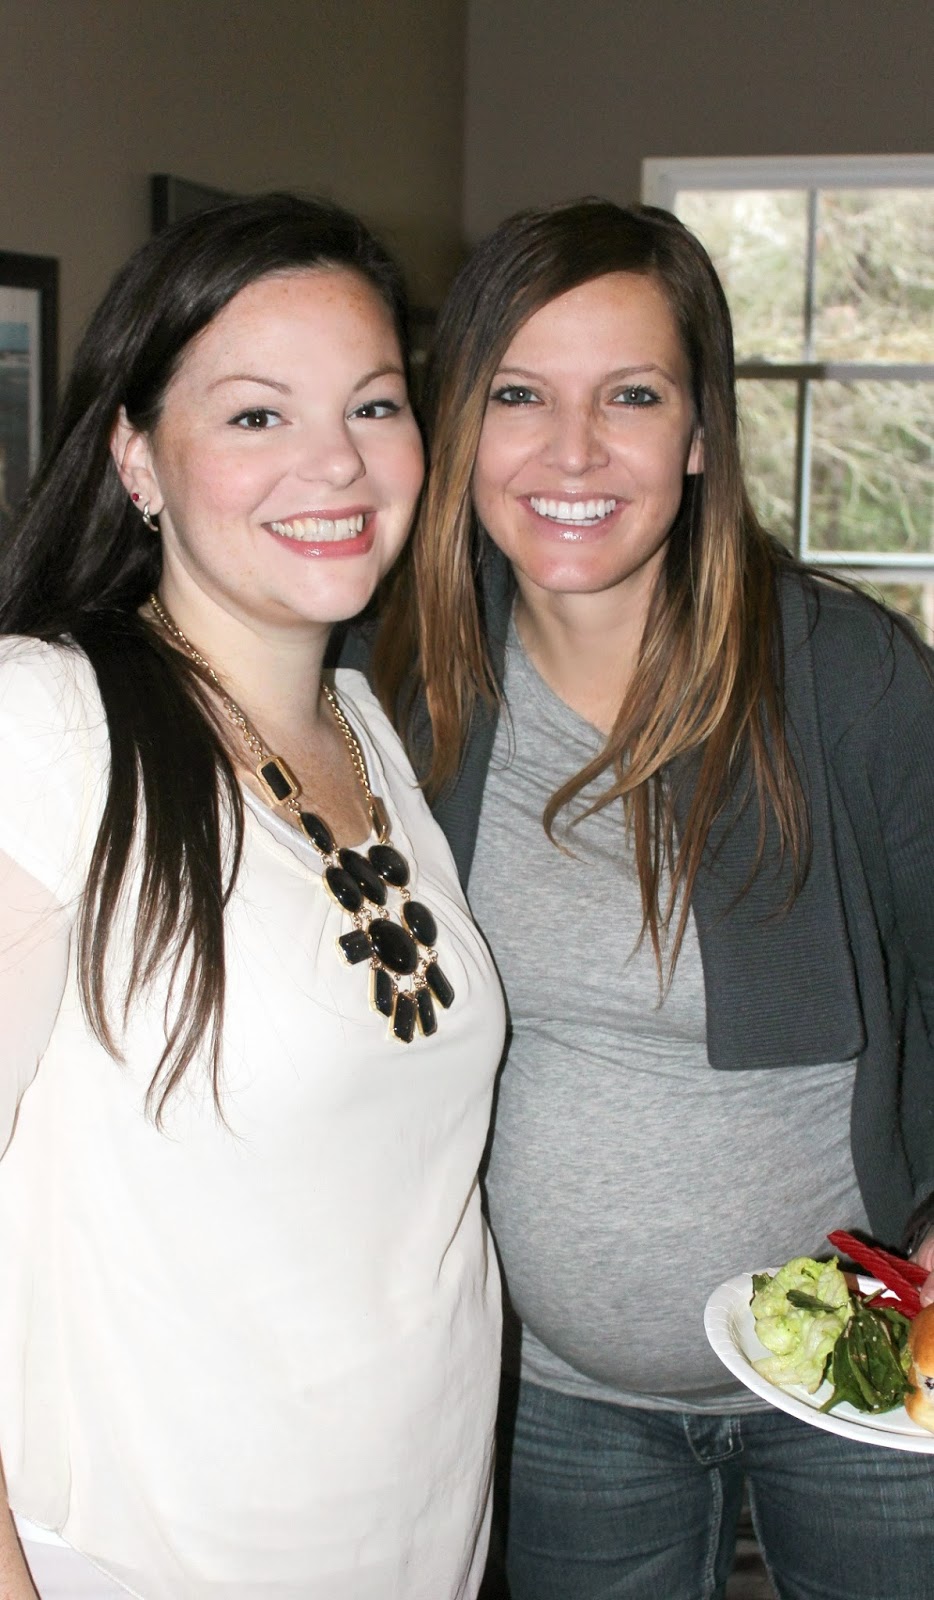
The mama to be and I


She really likes those red vines :) 


Linking up to: 


Thursday, February 20, 2014

Painted Doors


 Good Afternoon everybody!  I am choosing to have a nice peaceful afternoon after a crazy hectic morning. It is suddenly very warm outside this week and I am reminded that I actually do, in fact, live in South Carolina.  I was getting confused there for a little while, with all of the snow plows and ice storms and such.  It's nice.  I have had all of the windows open in the house and the gentle breeze and fresh air that comes in stirs up excitement and motivation in me.  I'm ready for spring :)  How about you?

Today I'm going to share with you a couple of spaces in my house.  I have painted almost every door in my home a different color.  I know that sounds crazy, but I seriously LOVE it.  I made sure to paint each door with a color that coordinated both with what was around it on the outside and also the color scheme of the room inside of the door.  I have said before that our house is basically one big center room (our living room or great room)...and then most everything else opens into said room.  It's actually not a huge room either (sigh...I need a bigger house, but I'm totally grateful for the one I have!).  Our living room has soaring vaulted ceilings so it makes it feel huge....so that's good at least.  I have two hallways....they aren't really hallways, though....more like squares with doors on every wall.  One on either side of the front part of my living room.  You can see the layout below.

I have some pictures from a recent baby shower that show you pretty much my entire living room as it is now (it is in process of being made over....so most of what you see will change, except the couch...can't justify getting another couch with little kids that will destroy a new one)

This shot is if you were to be standing in front of the back door and facing diagonally across the living room towards the entryway....there were extra chairs and lots of people, but you can see the hallway in this shot.  You can also see the door to my garage...the only one that's not painted.  I appear to be off in my own world, oddly gazing out the widow in this shot.  I have no idea what that's all about.


Here are the other two doors in that hallway.  The blue door is to the master bedroom, and the green door is to the laundry room and once you pass through the laundry room, there's another door that goes up the stairs....such a weird layout.  I can't stand that you have to go through the laundry room to get upstairs.  We have plans to change the washer and dryer nook into built ins and put the laundry room out in the garage.  I love the combo of the blue and green together in this hall.  It feels fresh and almost nautical to me.  I'll be adding more stuff to the walls in here too.  It's totally unfinished. 


Okay, so back to my living room...This shot is standing in the same place (in front of the back door) but instead of looking across diagonally (which would be to the right of what you are looking at), this is looking strait ahead.  You can see my other little hallway in this shot.


Here is what this hallway looks like.  See what I mean when I say that I can't exactly call it a hallway...it's all doors.  The gray door is the kid/guest bathroom, the aqua door is both of my little girl's shared room and the yellow door is our spare bedroom/guest room/ gonna be an office too someday room.  Right now it just houses a queen bed, and all of my girls' clothes.  It was better to keep them in a separate room from all of the rest of their stuff for the sake of my sanity.  
I know, if you compare the first hallway with this one, the colors do not work at all....but it works in this house, because you are never able to see both halls at the same time.  I really love walking through my house and suddenly seeing a shot of aqua or grass green.  I think they are lovely.  There is also another door that is just to the left of the bathroom which is still white, but it's a teensy skinny door to our linen closet.  Someday I'll probably paint that too...just haven't gotten to it yet.  


ok....disclaimers about this photo.....Yes, the floor is unfinished in this shot.  In the spare room (which I am too ashamed to show you a picture of until I've actually already fixed it up...then I'll let you see how bad the before was), the floor is half done.  I know, it's a sad situation.  I still have not gotten around to putting in the one small piece that needs to be slid under those door casings.  I just, as I'm typing this, decided that I need to get on that asap, because it looks horrible.  Way to go blog!  Keep me accountable!   The other little bit that is unfinished, is the transition strip to the bathroom.  We left it off because we are going to be tiling the bathroom soon (water damaged linoleum currently lives in there and it needs to GO very soon). 

The other thing about this photo is the chain lock on my daughters' door.  I have to explain before you guys think I'm some horrible mom who locks her children away.  We only use this at night, after they have already fallen asleep.  My girls don't like to have the door closed, so we leave it open until they fall asleep and then we lock it.  In the event that they wake up during the night and find it locked, we decided the best thing was to have the chain, so that they don't feel trapped and they can still see out, and yell out.   We decided to do this after having a few incidents of my daughter getting up in the middle of the night and rummaging through the fridge, and getting into things she shouldn't.  She doesn't come wake us up....she is super mischievous.  It's important to me for peace of mind to know they are safe and not playing with the knives in the kitchen or something.  Usually we are up before them and we unlock it before they wake up, so they don't feel trapped or anything.  I plan on phasing it out very soon... we have actually started leaving it unlocked here and there to see how things go, since she's hit three, she has been a little bit better about not getting into things.  

The last painted door is my back door.  I painted it navy! 
This isn't the super best shot, since it's hard to get a shot of windows....but I really love it.  I almost went black, but decided last minute that navy would be more fun.  You can  also see a little bit of my in progress built-ins right next to the door.  :) 


I also painted my front door a charcoal gray color, which you can see in some of the shots here, but I am not leaving it that color....I have plans to paint it a FUN color pretty soon!  

So there's a glimpse of some of my house....the pretty and the ugly! 

What do you think of the painted doors?  I LOVE them!  It's an easy, cheap way to add a splash of color to your house.  I was able to do each of these with just a test pot.  They were like 2.50 each.  I will have to dig up the paint colors and post them here soon.  

Hope you all have a great day! 
xoxo
Anna 


Shared at:

Monday, February 17, 2014

How to keep a clean house for the non-type-A, stressed out, over whelmed, stay-at-home mom!

Hey Folks!  Did you all have a great weekend?  I hope so :)  Happy President's Day!  I'm so very glad to have my husband home with me today, even though it's business as usual around here.  My house tends to get very messy on the weekends.  It's my fault.  I look at the weekend as "time off" of "work"....and I don't really clean.  Not really at all.  for two whole days....  I might do singular project stuff, like cleaning out a closet or something like that, but I don't touch the dishes or the laundry, I don't sweep or wipe or anything.  It's bad.  I know I should be better about it....at least on Saturdays, my husband usually steps in and does some dishes, but in general the place is a mess.  I am not a type-A girl.  When I was a kid and in high school, my room was always a mess.  I remember getting my "desk dumped" at school in front of the whole class a few times by the teacher because it was such a mess (what a horrible thing to do to a little kid, btw).  I am not naturally that type of person...it isn't a talent or skill I was born with.  Now, as an adult, I hatehatehatehate for things to be dirty.  I hate mess and I hate disorder.  I also have four children that constantly run around and wreck everything I've just cleaned up....it gets very overwhelming and I have been known to have a melt-down or two when I am faced with a big mess. I am a singular focus kind of girl.  I have been known to walk past a rouge apple core in the middle of the floor if I'm focused on some other task.  (I will pick it up, obviously, I'm not an animal...but it might be something I come back to an hour later).  I have always tended to only deal with messes when I had devoted my time to cleaning, and I clean everything all at once...so while I'm scrubbing the heck out of one room for hours on end, my kids are in the other room unsupervised trashing it....it just doesn't work.  Sometimes I get envious of those very OCD girls who can't stand for one single little thing to be out of place, so they are constantly able to keep everything perfect.  (I know, I know, I shouldn't be, because that's the other end of the spectrum and being OCD comes with a whole other host of difficulties).  I wasn't really taught growing up how to follow through with a schedule or a system.  These are things I've had to teach myself as an adult...and it has taken a lot of trial and error to figure it out.....BUT, I think I can say that by golly... I've finally figured it out!  I have come to the point in my life where I've learned to embrace my type-B-ness.  I have decided that I can have the best of both worlds.  A constantly clean home, but also the relaxed attitude that I've always had, which in my opinion, makes me a happier person.  It all started when I had an epiphany.  I mentioned this before here, and talked a little about what got me started down this path.  Well, as I was reading the advice from this post on housewife how to's....I realized that it's all about routine....following the same routine every day....whether you get it all the way clean in one day, doesn't matter....just as long as you are doing it EVERY DAY (or at least all day during the week, because you know I like to take my weekends off...lol).  I have since re-vamped my entire routine, and it's amazing.  I feel like I've finally found the secret to running a successful household.  I'm going to share with your my routine.  Hopefully this can help someone else out there who struggles with running a household the same way I have.

First thing each morning....
Start a load of laundry!  I choose to do this first because swapping laundry is a physically active thing, yet it doesn't really seem like it is (as opposed to scrubbing the kitchen floor).  It's an easy gateway activity that tricks your body into starting to MOVE.  Scientifically, things in motion want to stay in motion, and things that are still want to stay still....so I've often found that getting your blood pumping is the best way to get yourself motivated to keep going....a little caffeine helps too...

Okay, so start with laundry....
Then move on to every bedroom.  Don't fully clean each bedroom.  Only spend five minutes per room.  Make the bed....grab any trash that you see, or laundry on the floor, or a pick up a couple of things that belong in a different room and move on.  The point is that you want to visit each room and get in the habit of that.  Don't stress that you aren't able to clean the whole room (if it's already a mess)....if it's not a mess, then you are golden, so just spend five minutes tidying it up.  Just do five minutes per bedroom around the house.  Each day the room will be a little bit cleaner than it was the day before...until you have it perfectly in order and you are just cleaning up the mess that was made in the 24 hours since you last cleaned it up....which won't be much, because people subconsciously will keep a clean room cleaner than they would a dirty one.

 Next go to the bathrooms.  Do a quick wipe down.  I'm really liking clorox wipes for that....but you know what you can even use baby wipes.  They work well for bathrooms too.  Don't try to clean the whole room.  Just decide what your quick freshening will be.  I wipe my sinks and wipe down the entire toilet, and check the tub to make sure there's no scum from last night's bath.....move on... shouldn't take you more than five minutes....abandon it if you can't finish in five minutes.

 After that, I hit the kitchen.  I try to have all of my dinner dishes loaded and in the dishwasher each night, so I wake up to a load of clean dishes....that might happen once a week.  I'm usually too exhausted at the end of the day and they are still in the sink in the morning.  So I start my breakfast (eggs)...and I round up all of the dishes.  I have a very specific routine for cleaning the kitchen, but I'm sure everybody has their "own way" so I'll spare you the details on that....just make sure you have your dishes done and loaded in the dishwasher, and then wipe all of your counters, wipe out the microwave at the same time that you wipe the counters (this will keep you from ever having a dirty microwave again), and spot check your cabinets and fridge for any smudges.  Wipe the kitchen table, then the trashcan (if it's out in the open like mine), and then wipe out your sinks.  Sweep the floor, and then wipe up any spots you see on the floor....do a quick spot check....no need to scrub the entire floor.   All of this will take you more than five minutes, but I like to race against my eggs.  I try to have it all done before my eggs are finished cooking.  The key here is to hurry the heck up! Be fast!!!

Next I move on to my "list".  I've found the key for doing chores is to not put pressure on yourself.  I made a list of all of the things in the house that need to be done on a regular basis.

My list is as follows, but everyone's would probably be different.


  • Mop Kitchen
  • Scrub Down Living Room
  • Scrub down entry way
  • Scrub down Laundry Room and Halls
  • Mop Living Room
  • Change all Sheets
  • Scrub down Boys' Room
  • Mop/vacuum Boys' Room
  • Vacuum stairs
  • Scrub down spare bedroom
  • Vacuum spare bedroom
  • Scrub down Girls' Room
  • Vacuum/mop girls' Room
  • Scrub down kid's bathroom (including toilet bowl and floor) 
  • Scrub down Master Bathroom
  • Mop Master Bathroom/ vacuum master closet
  • Scrub down master bedroom
  • Vacuum master bedroom
  • scrub down kitchen (stuff you don't normally wipe, like walls, baseboards, chair and table legs, vent hood, etc.)
I pick one thing a day and then go through my list.  If I miss a day, no biggie...I just pick right back up where I left off.  When I say "scrub down" I mean wipe all surfaces, which will include flat surfaces and mirrors and windows and baseboards, trim around doorways, doors and walls.  Some days this is a big job....other days, it's a tiny job.  Sometimes I'm super thorough, other days I'm not.  The important thing is to keep rotating though your list.  Clean something even if you don't think it needs to be cleaned.  The more times you make it through your list, the faster it will go....If you don't get everything super clean on one pass, the next time you come to that item on the list, it should be easier and you can deep clean a little more.  The important thing is to get in a routine!!!!!  Keep going.  Even though you aren't doing all of the work at once, you are still cleaning things faster than they get dirty, so you will make headway.  After a while, you'll notice that things are constantly clean.  

As far as my routine goes, after I get my daily chore done, I take a break and do other things until after lunch.  I put the littles down for their naps and then I finish my routine, which is to pick up the main areas of my house, sweep out all of my main living spaces and then fold and put away any laundry I've done during the day.....and that's it....My whole cleaning routine.  Since I've been following this new way of cleaning, our whole house has been different.  I've noticed that my kids have started taking better care of things.  It's much much easier for me to teach them to clean up when I'm first setting an example.  I still have the kids do chores, but now I can pick and choose things instead of giving them something that could overwhelm them....like cleaning a horribly messy bedroom.  Now, it's unload the dishwasher, or wash these windows, or take out the trash....bite sized pieces they can handle.  

I know this is long and god bless whoever made it through to the end.  I hope this was able to help someone else out there.  

Take care and have a wonderful day!   

xoxo!

Thursday, February 13, 2014

What to do with used up stickers? Make a pillow....a Valentines pillow!

Hi!
We are still shut in our house after having a SECOND ice storm in South Carolina in 30 days.  I can hardly believe it, actually.  The kids will be out of school for the third day tomorrow, and we have just been hanging out in the house.  I'm still feeling under the weather, but am a bit better.  I actually got up and did the dishes today.  I had to sit down half way through (this mess is in my lungs and I've been a bit out of breath), but at least I have been sort of productive.  My oldest daughter and I worked on her Valentine's box for school (they'll be celebrating on Tuesday, since they have been out all week).  I was totally late with that project, but there was no rush, since they were out of school.  I also made a little Valentines pillow for just a hint of Valentines decor around here.  I had plans to do a few other things, but being sick kind of derailed me.  There's always next year.

Here's my daughter's Valentines box.  I just have to share, because it's too cute.  It was much cuter before she covered it in stickers....but it's supposed to be her project, so I had to let her decorate it the way she wanted.  We covered a cereal box with grey chevron fabric using spray adhesive and a couple spots of hot glue....then we added glitter ribbon and pom pom trim with hot glue, and then we made an "I" and a few hearts out of card stock, covered them with pink fabric (using spray adhesive) and then hot glued them to the box.  The rest is stickers, stickers, stickers!  ha!


She's totally going to have the coolest box!

ok...on with the tutorial.

I was at preschool last week with my youngest daughter and we were making a Valentine's craft.  They used up a ton of heart stickers, and I suddenly had the thought.....hey, why throw these away, the sticker outlines would be a great stencil.  So I asked them if I could take a few of the used up sheets of stickers home with me.  I have a TON of left over drop cloth material after making my curtains.  I will show you those later, even though you've basically seen them here.  So I decided to whip up a cute pillow cover for Valentines day using those stickers and some drop cloth material.


First, I measured my pillow.  It was 15 inches tall and 17 inches wide.  
Then I folded my fabric around my pillow to get a good idea of how much overlap I would have on my pillow cover.  (this is just a basic envelope style pillow cover....that you can find everywhere) 


I folded the material, using the seam that was
already there (from the edge of the dropcloth) as my finished edge for the back pocket.  I folded that edge first, so that it was on the inside, and then I folded the unfinished edge over on top of it.  (I didn't bother finishing it, since it's on the inside and you'll never see it.


There are those purple pants again.....
Once it was folded, I adjusted it until the side edge was 14 inches (one inch less than my pillow measurement) and then I marked the sides to reflect a width of 16 inches, which was one inch less than the width of my pillow.  I went ahead and trimmed the sides so that I had a 1/2 inch seam allowance.  It just made it easier to deal with on the sewing machine.  So my total width of fabric was 17 inches, but I marked 1/2 inch in on either side, so that I had a 16 inch wide pillow cover.  Does that make sense? 

Next all I did was sew a strait line up both sides.  Easy peasy.  

  
Turn it inside out and you've got a pillow cover. 

Next I took the emptly stickers and cut them up, so that they were separated.  


Then I lined them up on my pillow cover, measuring the distance between the points on the hearts (make sure you are looking at the hearts and not the white around the hearts...those are uneven and will result in unevenly spaced hearts)  I measured from point to point.  I measured from side to side and from top to bottom as I added a new row.  


There weren't enough stickers to cover the entire pillow, so I worked in batches.  I just made sure the sticker was really pushed down for each one before I started painting.  I chose to paint my hearts in gold :)


Originally I was going to put a different strip of fabric down the middle, so that's why I was working in a weird pattern there....I ended up scrapping that idea, so I just filled the rest in after this. 


For a little fun, I decided to make these three little hearts in the middle a different color.  


I had some little glitter letter stickers from the valentines box you see above...so I just used a few to give my hearts some hugs and kisses :)


I alternated those with pink and red. 


The Xs didn't come out as clear as the O did, so I just filled them in with red.  I think it looks better that way anyways.  


It looks super cute, I think!  


I tried adding some pom pom trim...which I think is totally cute, and if this were going in my daughter's room, I'd definitely add it....


but in the end, I like the simple understated look of the pillow without the pom poms.  It flows better with the main part of my house, so that's what I went with.  


Which do you like better?  

Have a happy Valentines Day!!!  
xoxo
Anna 


linking up to: 


Tuesday, February 11, 2014

Easy Table Runner

Good Afternoon!  Today, I am sick....it stinks.  I pigged out this weekend on all sorts of goodies, instead of my normal eating habits that do not include sugar or starches of any kind...and BAM, whatdoyaknow....I'm sick.  It makes a huge difference in how my body operates.  I'm fine with eating an extravagant meal here and there, especially if we have plans or some function to go to, but I just can't seem to keep that in moderation.  If I "fall off of the wagon" I use it as an excuse to gorge myself until I get a fresh start the next day (or even monday if it's the weekend).  Maybe I'll learn my lesson....maybe not....

This weekend we had SO many different gatherings that we attended.  It can be nice to feel so very loved when you are invited out a lot...but also, it's exhausting and pocket draining.  One of the things I had going on this weekend was a low key casual baby shower for a girlfriend of mine which we hosted at a restaurant.  It was easy and no fuss, which is what she wanted since this is her third child.  More like a night out to celebrate and pamper her.  I was tasked with coming up with a cute table runner for her that she could take home and use at her house....and a few other little table decorations.  

I'm going to show you how I made the table runner today.  I seriously have this down to an art. We do a lot of baby showers in my social circle and I've made a lot of table runners.  It is so simple to get all of you measurements even and correct if you follow these steps.  


I started out with 1 yard of fabric.  I got this pretty blue print at Hobby Lobby.  I knew that another friend of mine was bringing flowers that would be in lemons and limes.....that's all the color scheme we had to go with.  That and the mother to be said she "liked blue".  She told me that she liked my style and to just choose for her (made it hard for me, I tell ya) 


The first thing I did was to fold it into thirds.  You just fold one side over to where it looks like the edge is directly in the middle of the visible plane of fabric you are looking at. 


Then I just folded it over again so it's folded in three even sections.  


Next I cut along the fold on each side.  


Now, this isn't precise, so you will have to measure the width of all three pieces you wind up with to see how wide you are going to make your runner.  
My skinniest piece was 14.5 across, so I decided that I wanted my runner to be 13.5 across.  Taking off half an inch for each side's seam allowance. 


Now, you don't want to just go along and hem a half inch in on each side. This would result in a wavy edge and the width of your runner wouldn't be even all the way down, since you didn't go through the annoying painstaking process of perfectly measuring your three pieces in the beginning.  So what we do, here is much easier.  You fold your piece of fabric in half lenghwise and measure out from the middle.  I want my runner to be 13.5 inches, so we measure 6.75 inches from the center and then mark it.  Do that every so often along the length of the fabric.....then flip it over and do the other side.....then repeat for your other three pieces.  It goes really fast.  I know it sounds tedious, but it wasn't so bad at all.  


Once you have it all marked, you put two pieces together with right sides together. 


You need to line up the marks on each side.  If you measured correctly, they should perfectly match up, while the cut edge of your fabric won't match up.  


Next, sew your pieces, right sides together, end to end.  Normally, I'd say make sure to match up your pattern while doing this, but in this case, I was lazy and didn't do it.  I think I was able to get away with it because it was a busy pattern.  It is always better to match up the pattern, though....and I usually do.  


See, you can't really see the seam that bad on this fabric.


once you sew all three pieces together, you will have a very long stretch of fabric. 
Here is where you will need to decide how long you need your runner to be.  I decided to go with the full length I could get, because I knew we were going to a restaurant and would probably have a really long table.  If you have a table to measure, I suggest laying it out on your table and seeing how long you want it, and then trimming accordingly. 


Next, you iron the seams you just created.  Open them and iron them flat. 
My ironing board is so gross....sorry.  (maybe I should DIY one....hmmm..)


A flattened seam makes the finished product look so much more professional.  Don't skip this step. 


Next it is time to sew the sides. You go back and find your marks and fold on the marks.  You can put  pins in it all the way down, if that's the way you like to do it, or you can do like me and just move one pin down a bit as you go.  I also made sure to keep the edge of my presser foot at the edge of the hemmed side of the fabric, so that my seam would be a nice and even distance from the finished edge all the way down.   
note....I chose not to do a "finished hem" on the sides (which would be folding it over twice so that the raw edge is hidden).  I hate having a table runner with a lump on the side where the seam is, so I went this route to keep it nice and flat. 


finished edges


For the top edge, I started by folding and pinning the corners in.  Make sure you pin at the bottom of your little triangle, so the pin doesn't get in the way as you fold. 


Fold the top halfway down the triangles, and then fold over again (to hide the raw edge) so that the triangles are all of the way folded over as you see below. 
Pin in place.  


Sew the whole thing down, and then come up the edges a little bit along the folded triangle part.  Don't forget to back-stitch at the beginning and end of your seam. 


Press all of your seams and then give your runner a good ironing.  


There you have it!  A perfect table runner....well, except that this one is waaay too long for my table.  :) 


Some shots of the baby shower....

I made the "C" (I'll do another post on that) and another friend did flowers and another did the diaper cake


I'm a dork 


These had cupcakes in them.  My amazing friend made them and made the boxes.  She's awesome, I tell ya.  


Love these girls.  Hope nobody minds their picture on here....I'll take it off if you do, just let me know. It's just such a great shot! 


the "C" on the candlestick are from my house. see it here


It turned out really pretty.  The waitress said she had never seen a cuter baby shower at a restaurant before.  The lighting was crazy in there.  All of the stuff that is blue looked green.  I tried to fix it, but the pictures still came out crazy.  

Hope you all have a great day.  

xoxo! 
Anna